设置MetaMask(Setting up MetaMask)
MetaMask wallet is a convenient and fairly easy-to-use application for storing Ethereum addresses and private keys.
MetaMask 钱包是一个方便易用的应用,用来存储以太坊地址和私钥。
目标(Goal)
To install the MetaMask on your device to connect the wallet to the Solana Testnet environment.
在您的设备上安装 MetaMask 进而将钱包连接到 Solana 测试网环境。
设备要求(Device requirements)
A browser which supports the MetaMask must be installed on your device. You can use Chrome, Opera, Firefox.
您的设备上必须安装支持 MetaMask 的浏览器。您可以使用 Chrome、Opera、Firefox。
Although this tutorial uses the Ubuntu platform, the instructions provided can be applied to other platforms.
虽然本教程使用 Ubuntu 平台,但提供的说明对其他平台适用。
安装MetaMask (Installing MetaMask)
第1步(Step 1)
Go to the MetaMask download page. From there, select any platform you use and follow the instructions to load and install MetaMask your device's browser. (Fig. 1 shows an example of installing the MetaMask on the Chrome browser.)
转到 MetaMask 下载 (download)页面。从那里,选择您使用的任何平台,然后按照说明加载和安装 MetaMask 到您设备的浏览器。

(图 1 显示了在 Chrome 浏览器上安装 MetaMask 的示例。)
第2步(Step 2)
MetaMask is essentially a plugin in the form of an extension to a browser. Therefore, MetaMask can be added to your browser as an extension. In the window, as shown in Fig. 2, click Add extension.
MetaMask 本质上是一个以浏览器扩展形式出现的插件。因此,MetaMask 可以作为扩展添加到您的浏览器中。在窗口中,如图 2 所示,单击添加拓展”(Add extension)。
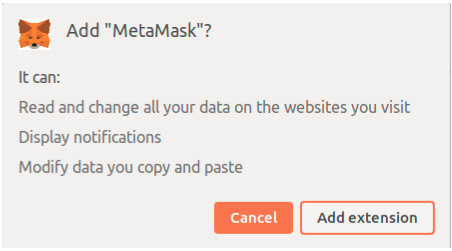
(图 2)
When the MetaMask extension is installed, a fox's face (MetaMask’s logo) will appear in the upper left corner of the web browser window. This means that you have successfully installed MetaMask on your device and can start using.
安装 MetaMask 扩展程序后,狐狸的脸(MetaMask 的logo)将出现在 Web 浏览器窗口的左上角。这意味着您已经成功安装了 MetaMask 并且可以开始使用了。
第3步(Step 3)
Create a wallet if you don't already have one. MetaMask offers a choice of two options for creating an account:
如果您还没有钱包,请创建一个钱包。 MetaMask 提供了两种方式创建账户:
Import an existing wallet using a 12-word passphrase.
通过12个单词的助记词引入一个已经存在的钱包Create a new wallet.
创建一个新钱包
Go ahead and Create a Wallet On the support page Help Us Improve MetaMask click I agree.
继续 创建一个钱包 (Create a Wallet) 。在支持页面上的帮助我们改进 MetaMask (Help Us Improve MetaMask),单击我同意 (I agree)。
The password generation form should open on the display. Enter a secret code that must contain at least 8 symbols.
密码生成表格应在显示屏上打开。输入必须包含至少8个符号的密码(密码长度大于8)。
A secret phrase will be generated automatically. Record the secret phrase for backup (preferably not on a device connected to the Internet). Without this phrase, your funds cannot be refunded if your device is damaged or lost. Confirm that you have written them down on the next page.
之后会自动生成一个密码短语。记录用于备份的密码短语(最好不要放在联网的设备上)。如果没有它,如果您的设备损坏或丢失,您的资金将无法找回。在下一页确认您已将它们写下。
After that, you should see your wallet linked to your account.
之后,您应该会看到您的钱包与您的帐户相关联。
设置RPC网络 (Setting up an RPC Network)
You can use your wallet to interact with the Solana cluster via a proxy server. To do this, you need to configure your wallet to the desired proxy server.
您可以使用钱包通过代理服务器与 Solana 集群进行交互。为此,您需要将钱包配置为期望的代理服务器。
Depending on the tasks to be solved, as well as on the location of the proxy and Solana, there are 3 options for setting up the MetaMask wallet:
根据要解决的任务以及代理和 Solana 的位置,设置 MetaMask 钱包有 3 个选项:
Option 1: Both the proxy and Solana are hosted on remote servers.
选项 1:代理和 Solana 都托管在远程服务器上。Option 2: The proxy is hosted locally, Solana is on a remote server.
选项 2:代理在本地托管,Solana 在远程服务器上。Option 3 (debug mode): Both the proxy and Solana are hosted locally.
选项 3(调试模式):代理和 Solana 都托管在本地。
第4步(Step 4)
In the upper-right corner, click the red apple view element. Select settings from the dropdown menu to connect to the proxy server (Fig. 3).
在右上角,单击红色苹果的视图元素。从下拉菜单中选择设置以连接到代理服务器(图 3)。

(图3-从下拉菜单选择“设置”)
The dropdown menu elements:
下拉菜单所含的元素:
My Accounts:list of accounts created by your wallet.
我的帐户:您的钱包创建的帐户列表。Account 1:account of your wallet that was created during the MetaMask installation; this account provides management of your wallet.
账户 1:您在 MetaMask 安装期间创建的钱包账户;此帐户提供对您钱包的管理。Create Account:this allows you to create one more account to interact with the new proxy server; you can configure this wallet to interact with multiple proxy servers.
创建帐户:这允许您创建一个新帐户与新的代理服务器进行交互;您也可以将此钱包配置为与多个代理服务器进行交互。Import Account:this allows you to import your private key generated and saved previously into this wallet and use it in the future.
导入帐户:这使得您可以将之前生成并保存的私钥导入此钱包并在将来使用它。Connect Hardware Wallet:this allows you to save the private key to an external device (i.e. flash memory) located outside the network, thereby increasing the security of your private key.
连接硬件钱包:这允许您将私钥保存到位于网络之外的外部设备(即闪存),从而提高私钥的安全性。Settings:used to change the default values; by default, the wallet is configured for Ethereum addresses, including those that you can’t use.
设置:用于更改默认值;默认情况下,钱包是为以太坊地址配置的,包括那些你不能使用的地址。
第5步(Step 5)
Click Settings in the dropdown menu. The window with settings menu for selecting a network should open (Fig. 4).
单击下拉菜单中的 设置 (Settings)。应带有用于选择网络的设置菜单的窗口就应该会打开(图 4)。

(图4: 选择网络)
第6步(Step 6)
Add a Network (Fig. 5). 添加网络(图5)

(图5:“网络”菜单)
The new window contains the settings for 6 default subnets. You need to use these settings to connect to the desired proxy. Click Add Network in the top-right corner.
新窗口包含6个默认子网的设置。您需要使用这些设置连接到期望的代理。单击右上角的 添加网络(Add Network)。
第7步(Step 7)
Fill in the fields on the next page (Fig. 6):
填写下一页上的字段(图 6):

(图6: 填写字段)
Network Name: "remote proxy — solana testnet"
网络名称: "remote proxy — solana testnet"New RPC URL: https://proxy.testnet.neonlabs.org/solana
新增PRC URL: https://proxy.testnet.neonlabs.org/solanaChain ID:245022940
链ID: 245022940Currency Symbol: NEON
Currency Symbol: NEONBlock Explorer URL (optional): URL of the block browser
区块浏览器 (可选): 区块浏览器的URL
Note: The Chain ID is specified for Testnet. To choose Devnet or Mainnet in this field, you need to specify the value 245022926 or 245022934, respectively.
注意:链 ID 是为测试网 Testnet指定的。要在此字段中选择 Devnet 或 Devnet,您需要分别指定值 245022926 或 245022934。
The wallet settings depend on the values given for the option mentioned above. 钱包设置取决于为上述选项提供的值。
第8步(Step 8)
Click Save to keep the settings.
Your MetaMask wallet has been successfully installed and is ready to use
单击 保存 (Save) 以保留设置。
您的 MetaMask 钱包已成功安装并可以使用。